How To Clean Your Dirt Bike Helmet: Expert Tips for a Sparkling Helmet
To clean your dirt bike helmet, use a damp cloth with detergent to wipe off the dirt, and rinse off the inside and outside with warm water to remove debris. If the inner pads can’t be removed, wash the entire helmet as is.
Dunking the helmet in a basin or bathtub can also be effective.
Preparing For Cleaning
Before you start cleaning your dirt bike helmet, it’s important to gather all the necessary cleaning supplies. Removing any accessories or removable parts will help ensure a thorough cleaning process. Follow the steps below to prepare your helmet for cleaning.
Gather necessary cleaning supplies:
- Mild detergent or baby shampoo
- Warm water
- Soft sponge or cloth
- Old toothbrush
- Clean towel
- Optional: Helmet cleaner or deodorizer spray
Remove any accessories or removable parts:
Before cleaning your dirt bike helmet, it’s important to remove any accessories or removable parts. This includes:
- Visor
- Chin curtain
- Cheek pads
- Inner foam
- Any other removable inserts or components
Removing these parts will allow for a more thorough cleaning and ensure no area of your helmet is neglected.
Ensure to keep all removable parts in a safe place or designated container to prevent misplacement.
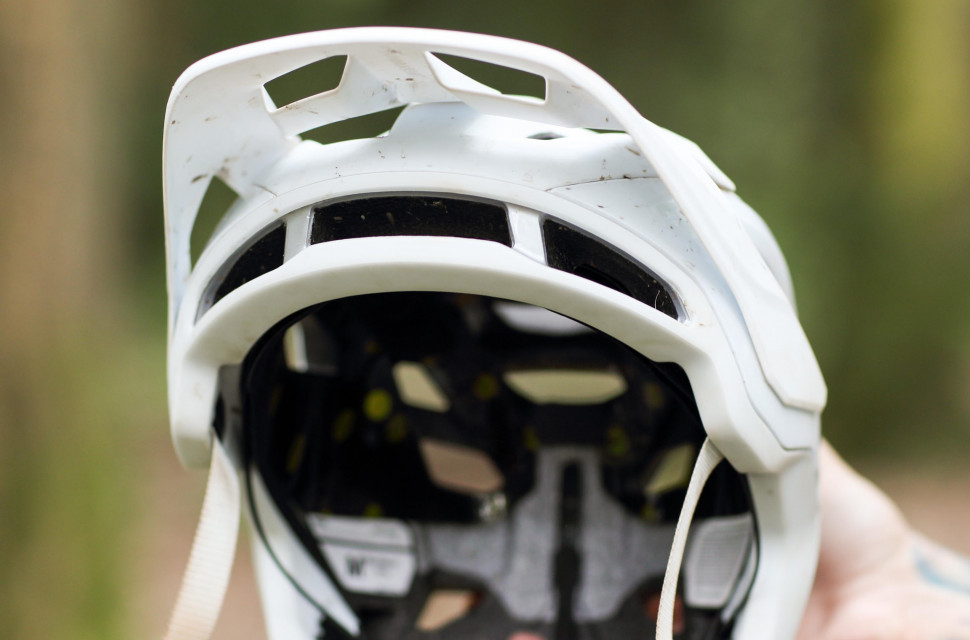
Credit: off.road.cc
Cleaning The Exterior Of The Helmet
Keeping the exterior of your dirt bike helmet clean not only maintains its appearance but also ensures optimal performance and longevity. Dirt, grime, and debris can accumulate on the outer shell, visor, and other external parts, impacting visibility and functionality. Here’s a step-by-step guide on how to effectively clean the exterior of your helmet:
1. Wipe down the exterior with a soft cloth
Begin by gently wiping the entire exterior of the helmet with a soft cloth. This will remove any loose dirt, dust, or debris that has accumulated on the surface. Make sure to cover all areas, including the top, sides, and back of the helmet. Wiping in a circular motion helps to loosen stubborn dirt and make cleaning more effective.
2. Use a mild soap and water solution to clean stubborn dirt and grime
If wiping alone doesn’t remove all the dirt and grime from the helmet, it’s time to bring out a mild soap and water solution. Fill a bucket with warm water and add a few drops of mild soap. Dip a clean cloth into the soapy water and gently scrub the areas with stubborn dirt and grime. Pay extra attention to areas like the visor, vents, and any intricate designs on the helmet’s exterior.
3. Rinse thoroughly and dry with a clean towel
After scrubbing, rinse the helmet thoroughly with clean water to remove any traces of soap. Ensure that all parts of the helmet, including the visor and vents, are properly rinsed. Leaving soap residue can lead to discoloration or damage over time. Once rinsed, use a clean towel to dry the helmet. Pat dry the exterior to avoid scratching the shell or visor.
Cleaning the exterior of your dirt bike helmet regularly not only keeps it looking fresh and clean but also helps maintain its protective qualities. A clean and well-maintained helmet ensures optimal visibility and comfort, allowing you to fully enjoy your riding experience. Remember to always follow the manufacturer’s instructions for cleaning and maintenance to ensure the longevity of your helmet.
Cleaning The Interior Of The Helmet
When it comes to cleaning your dirt bike helmet, it is important not to overlook the interior. The padding inside your helmet can accumulate sweat, dirt, and bacteria over time, which can be both unhygienic and unpleasant. Cleaning the interior of your helmet regularly not only helps maintain its longevity but also ensures a fresh and comfortable wearing experience. In this section, we will guide you through the process of cleaning the interior of your dirt bike helmet.
Remove the helmet padding and wash it separately
Before diving into the cleaning process, it is essential to remove the helmet padding. Gently pull it out from the helmet, making sure not to damage the foam or fabric. Once removed, you can proceed with washing it separately to ensure a thorough cleanse.
Use a gentle detergent and lukewarm water to clean the padding
In order to clean the helmet padding effectively, it is recommended to use a gentle detergent along with lukewarm water. This combination will help remove dirt, sweat, and odor without causing any damage to the material. Take a clean cloth or sponge and dip it into the diluted detergent solution. Then, gently scrub the padding, paying attention to areas that may have accumulated more dirt or sweat.
Rinse thoroughly and allow it to air dry completely
After cleaning the padding, it is crucial to rinse it thoroughly to remove any leftover detergent residue. This can be done by using clean lukewarm water and gently squeezing the padding to ensure all detergent is washed away. Once rinsed, place the padding on a clean surface and allow it to air dry completely. Avoid using direct heat sources such as hairdryers, as they may damage the padding.
Cleaning the interior of your dirt bike helmet is an important maintenance routine that should not be overlooked. By following these simple steps, you can ensure a clean and hygienic helmet interior, providing you with a comfortable and safe riding experience. Remember to check the manufacturer’s instructions for any specific cleaning recommendations and enjoy your next adventure with a fresh and well-maintained helmet!
Cleaning The Visor
Remove the visor and clean it separately
To effectively clean your dirt bike helmet’s visor, you should begin by removing it from the helmet itself. This allows you to clean it more thoroughly and avoid accidentally damaging the helmet during the cleaning process.
Use a non-abrasive cleaner and a soft cloth to wipe the visor
Once you have removed the visor, use a non-abrasive cleaner specifically designed for helmet visors. Avoid using harsh chemicals or ammonia-based cleaners, as they can cause irreversible damage. Apply the cleaner to a soft cloth and gently wipe the visor, paying close attention to any dirt or debris that may be present.
Rinse thoroughly and dry with a clean towel
After cleaning the visor with the non-abrasive cleaner, rinse it thoroughly to remove any remaining residue. Use warm water to ensure a complete rinse. Then, dry the visor with a clean towel, making sure to remove all moisture and leave it completely dry.
It is important to note that each step should be done carefully and gently to avoid scratching or damaging the visor. Take your time and use light pressure when wiping and drying the visor.
Cleaning The Ventilation System
Use compressed air to blow out any debris from the ventilation system
Cleaning the ventilation system of your dirt bike helmet is an essential step to maintain its performance and prolong its lifespan. Over time, dirt, dust, and other debris can accumulate in the vents, obstructing airflow and compromising your comfort while riding. To effectively clean the ventilation system, start by using compressed air to blow out any debris. This powerful burst of air will dislodge particles from the vents, allowing for better airflow and ventilation. Be sure to hold the compressed air canister several inches away from the vents to avoid damaging them.Use a small brush to clean hard-to-reach areas
In addition to using compressed air, utilizing a small brush can help you clean hard-to-reach areas of the ventilation system. The brush should have soft bristles to avoid scratching or damaging the vents. Gently brush the vents and surrounding areas to dislodge any remaining debris. Be thorough and pay attention to detail, ensuring that every nook and cranny is free from dirt and dust. This step will help optimize airflow and maintain the optimal performance of your dirt bike helmet.Wipe down with a damp cloth to remove any remaining dirt
After using compressed air and a small brush, it’s time to give the ventilation system a final wipe-down. Dampen a clean cloth with water and wring out any excess moisture. Then, gently wipe the vents and surrounding areas to remove any remaining dirt or dust. Take care to wipe in a circular motion, ensuring that you cover all areas and leave no residue behind. This step will not only leave your helmet’s ventilation system clean but also prevent any potential odor buildup. Remember to let your helmet air dry completely before using it again. To summarize, cleaning the ventilation system of your dirt bike helmet is crucial for maintaining optimal performance and comfort. By using compressed air to blow out debris, a small brush to reach difficult areas, and a damp cloth to wipe away remaining dirt, you can ensure that your helmet’s ventilation system is clean and functioning at its best. Regularly cleaning your helmet will not only extend its lifespan but also contribute to a safer and more comfortable riding experience.Reassembling The Helmet
Once you have thoroughly cleaned and dried all the parts of your dirt bike helmet, it is time to reassemble it. Follow these steps to ensure a proper and secure reassembly:Make sure all parts are completely dry before reassembling
Before moving forward with reassembly, it is crucial to ensure that all parts of the helmet are completely dry. This will prevent any moisture buildup or mold growth, which can be harmful to both the helmet and your health. Take your time to inspect each part, including the shell, visor, and padding, for any remaining moisture. If needed, use a clean, dry cloth to remove any excess moisture.Place the padding back into the helmet and secure it properly
Once all the parts are dry, carefully place the padding back into the helmet. Make sure to align the holes in the padding with the corresponding slots in the helmet shell. Press down firmly to ensure a secure fit. Take a moment to check that the padding is evenly distributed and properly positioned. Improperly placed padding can lead to discomfort and reduced safety.Attach the visor securely to the helmet
The final step in reassembling your dirt bike helmet is attaching the visor. Line up the slots on the visor with the corresponding pegs on the helmet. Apply gentle pressure and push the visor down until it clicks into place. Double-check that the visor is securely attached and won’t come loose during rides. A loose visor can obstruct your vision and compromise your safety on the trails. By following these steps, you can ensure that your dirt bike helmet is properly reassembled and ready for your next adventure. Remember to always prioritize safety and thoroughly inspect your helmet before each ride.Tips For Maintaining A Clean Helmet
Regularly inspecting and cleaning your dirt bike helmet is essential for safety and longevity. Here are some tips to help you maintain a clean helmet:Store the helmet in a cool and dry place when not in use
Proper storage is crucial for keeping your helmet clean. Make sure to store it in a cool and dry place when not in use. This will prevent moisture buildup and the growth of mold and bacteria. Consider investing in a helmet bag or case to protect it from dust and other contaminants.Regularly inspect and clean the helmet to ensure it is in good condition
Regular inspections are necessary to ensure your helmet is in good condition. Look for any signs of damage, such as cracks or loose straps, and replace any damaged parts immediately. Additionally, clean your helmet regularly to remove dirt, sweat, and odor.Avoid using harsh chemicals or abrasive materials when cleaning the helmet
While it’s important to keep your helmet clean, it’s equally important to use the right cleaning products. Avoid using harsh chemicals or abrasive materials, as they can damage the helmet’s shell and interior padding. Instead, opt for mild soap or helmet-specific cleaners. Use a soft cloth or sponge to gently clean the surface, and rinse thoroughly with water. Taking proper care of your dirt bike helmet is essential for both safety and longevity. By following these tips for maintaining a clean helmet, you can ensure that your gear remains in top condition for your next ride. Remember to store the helmet in a cool and dry place, regularly inspect and clean it, and avoid using harsh chemicals or abrasive materials during the cleaning process.Frequently Asked Questions Of How To Clean Your Dirt Bike Helmet
What Can I Use To Clean My Helmet?
To clean your helmet, avoid using products like Windex cleaner as they can cause damage. Instead, use a damp cloth with detergent to wipe off dirt. If the inner pads can’t be removed, wash the entire helmet as is. Rinse off with warm water, and try dunking the helmet in a wash basin or bathtub.
Wash the foam padding and cheek pads in a gentle warm cycle wash. Air dry pads out of direct sunlight.
Can I Clean My Helmet With Windex?
No, you should not clean your helmet with Windex. Windex contains ammonia which can cause irreversible damage to the helmet and visor. Use mild soap and water instead.
How Do You Clean The Inside Of A Motocross Helmet?
To clean the inside of a motocross helmet, use a damp cloth with detergent to wipe off dirt. If the inner pads can’t be removed, wash the entire helmet as is. Rinse the inside and outside with warm water to remove debris.
You can also dunk the helmet in a wash basin or bathtub.
How Do You Clean A Sweaty Bike Helmet?
To clean a sweaty bike helmet, wash it in mild soap and water, rinse thoroughly, and air dry. Use a few drops of dishwashing liquid in a bucket of water and a sponge. Avoid using products like Windex cleaner as they may damage the helmet.
Do not use a dirty rag to clean the face shield.
How Often Should I Clean My Dirt Bike Helmet?
It is recommended to clean your dirt bike helmet after every ride to maintain its hygiene and performance.
Conclusion
To maintain the performance and longevity of your dirt bike helmet, it’s important to clean it regularly. Avoid using harsh chemicals like Windex, as they can cause damage. Instead, opt for a damp cloth with mild detergent to wipe off dirt and grime.
If the inner pads can be removed, wash them separately. Rinse the helmet thoroughly with warm water and allow it to air dry. Remember to wash your helmet regularly to keep it in top-notch condition and ensure your safety on the trails.