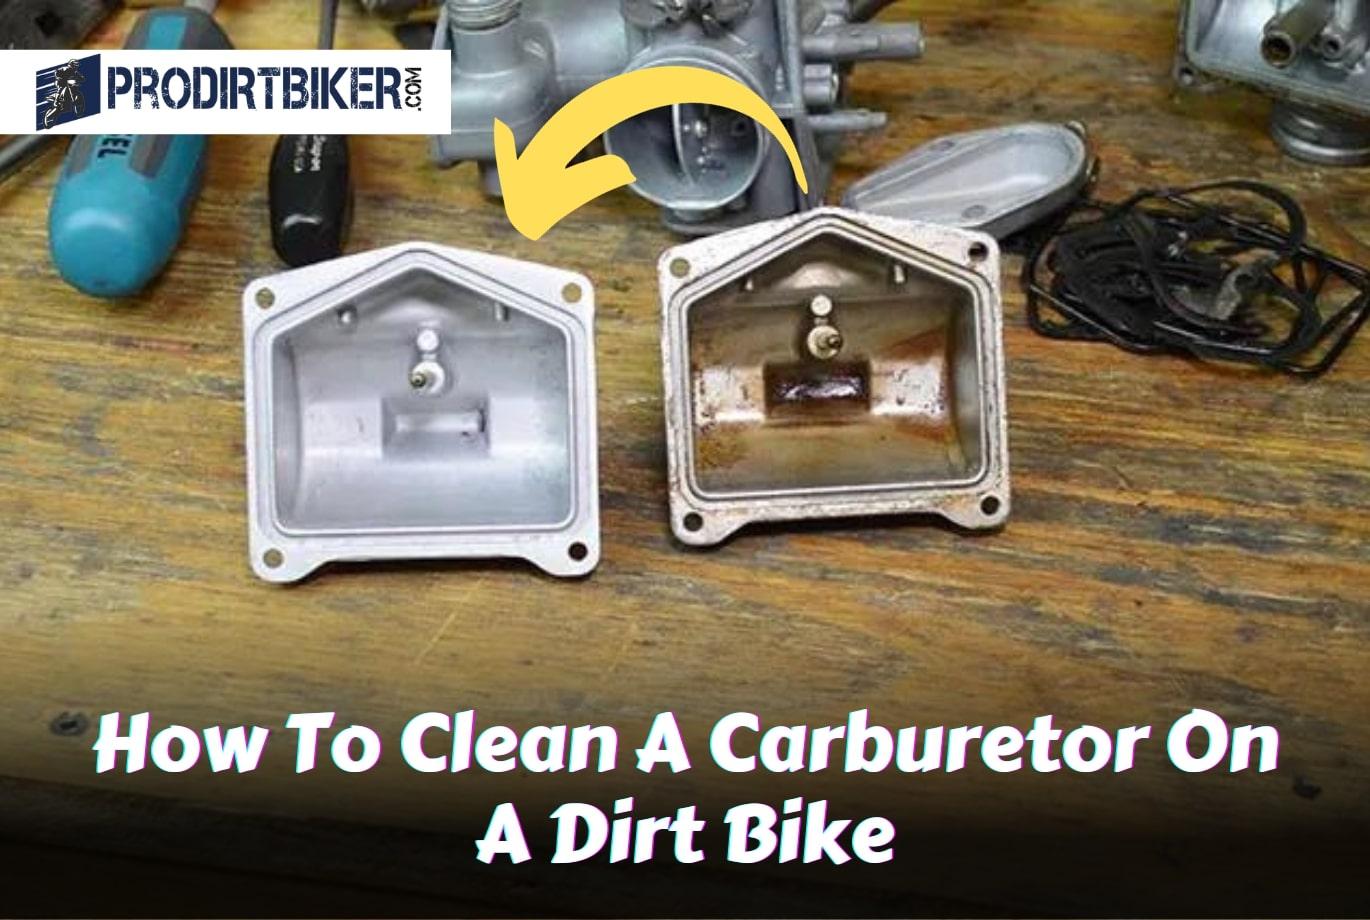
How To Clean A Carburetor On A Dirt Bike: Ultimate Guide
To clean a carburetor on a dirt bike without removing it, spray liberally with carb cleaner and let it soak for a few minutes. Then, use an air line to blow through the jets and repeat until all debris is gone.
Cleaning a carburetor on a dirt bike is an essential maintenance task that ensures smooth engine performance and prevents issues like poor starting, idling problems, and decreased fuel efficiency. Dirty carburetors can become clogged with debris and cause fuel flow issues, affecting the bike’s overall performance.
This article will provide step-by-step instructions on cleaning a carburetor without removing it, helping you keep your dirt bike running at its best.
Understanding The Importance Of Cleaning A Carburetor On A Dirt Bike
Understanding the Importance of Cleaning a Carburetor on a Dirt Bike
Keeping your dirt bike’s carburetor clean is essential for maintaining optimal performance and preventing potential issues. The carburetor plays a vital role in regulating the air and fuel mixture that powers your dirt bike’s engine. As dirt bikes are commonly used in off-road conditions, they are exposed to dust, dirt, and debris, which can accumulate in the carburetor and hinder its performance. Regularly cleaning your dirt bike’s carburetor is crucial for ensuring smooth engine operation and maximizing power output.
Exploring the Role of the Carburetor in a Dirt Bike’s Performance
The carburetor in a dirt bike is responsible for mixing the appropriate amount of air and fuel to create a combustible mixture. This mixture is then delivered to the engine for combustion and power generation. It acts as the engine’s fuel delivery system, controlling the flow of fuel into the engine based on throttle input. A clean carburetor allows for proper fuel atomization and combustion, resulting in improved engine performance, better throttle response, and increased power output.
Discussing the Potential Issues Caused by a Dirty Carburetor
A dirty carburetor can lead to various problems in a dirt bike’s performance. Over time, dirt, debris, and fuel deposits can clog the carburetor jets, restrict fuel flow, and disrupt the air-fuel mixture. This can result in poor fuel economy, reduced power, sluggish acceleration, and engine misfires. Additionally, a dirty carburetor may cause irregular idling, stalling, and difficulty starting the dirt bike. Ignoring the cleaning of the carburetor can lead to more severe issues such as damage to engine components, reduced lifespan of the dirt bike, and costly repairs.
Highlighting the Benefits of Regular Carburetor Maintenance
Regular maintenance and cleaning of the carburetor on your dirt bike offer several benefits. Firstly, it ensures optimal performance and efficiency by maintaining a clean fuel and air mixture. This translates to improved fuel economy, better throttle response, and increased power output. Secondly, proper carburetor cleaning prevents the accumulation of dirt and grime that can cause clogs and disruptions in fuel flow, leading to a smoother and more reliable running engine. Lastly, regular carburetor maintenance helps identify any potential issues early on, allowing for timely repairs and preventing further damages.
Step-By-Step Guide To Cleaning A Carburetor On A Dirt Bike
Cleaning the carburetor is an essential maintenance task for any dirt bike owner. Over time, dirt and debris can accumulate in the carburetor, leading to poor performance and decreased fuel efficiency. To keep your dirt bike running smoothly, follow this step-by-step guide to clean the carburetor effectively.
Gathering the necessary tools and materials for the cleaning process
Before you start cleaning the carburetor on your dirt bike, it’s essential to gather all the necessary tools and materials. Here is a list of items you’ll need:
- Carburetor cleaner: Choose a high-quality carburetor cleaner that is designed to remove dirt, grime, and varnish buildup.
- Protective gloves and eyewear: It’s important to protect your hands and eyes from any chemicals or debris during the cleaning process.
- Screwdrivers: You’ll need a set of screwdrivers to remove the carburetor from the dirt bike.
- Compressed air: Use compressed air or an air compressor to blow out any dirt and debris from the carburetor.
- Clean cloth or towel: Prepare a clean cloth or towel to wipe down the carburetor after cleaning.
Safely preparing the dirt bike for carburetor cleaning
Before you begin cleaning the carburetor, it’s crucial to ensure the dirt bike is safely prepared. Follow these steps:
- Turn off the engine and disconnect the spark plug: This step is important to prevent any accidents and ensure your safety.
- Remove the carburetor cover: Depending on your dirt bike model, you may need to remove the carburetor cover to access the carburetor.
- Disconnect the fuel line: Locate the fuel line connected to the carburetor and disconnect it carefully.
- Remove the carburetor: Use the appropriate screwdrivers to remove the carburetor from the dirt bike. Take note of the carburetor’s position and orientation for reassembling later.
Disassembling the carburetor and inspecting its components
Once you have removed the carburetor, it’s time to disassemble it for thorough cleaning. Follow these steps:
- Remove the float bowl: Unscrew the float bowl from the bottom of the carburetor to access the internal components.
- Inspect the components: Take a close look at each component, including the float, jets, and needle valve, for any signs of damage or clogging. Replace any damaged parts as needed.
Thoroughly cleaning the individual parts of the carburetor
Now that you have disassembled the carburetor, it’s time to clean each part individually. Follow these steps:
- Soak the components in carburetor cleaner: Place the disassembled parts in a suitable container filled with carburetor cleaner. Allow the parts to soak for the recommended time specified on the cleaner’s label.
- Scrub the components: Use a soft brush or toothbrush to gently scrub away any dirt and grime from each part. Pay special attention to the jets and other small openings.
- Rinse the components: After scrubbing, rinse each part thoroughly with clean water to remove any leftover cleaner and debris.
- Blow out the components: Use compressed air or an air compressor to blow out any excess water and ensure all the parts are completely dry.
Properly reassembling the carburetor after cleaning
With all the individual parts cleaned and dried, it’s time to reassemble the carburetor. Follow these steps:
- Reattach the cleaned components: Place each cleaned component back into its respective position within the carburetor, following the reverse order of disassembly.
- Tighten the screws: Carefully tighten the screws to secure the components in place. Be cautious not to overtighten, as it may damage the parts.
Testing and adjusting the carburetor for optimal performance
After reassembling the carburetor, it’s crucial to test and adjust it for optimal performance. Follow these steps:
- Reconnect the fuel line: Carefully reconnect the fuel line to the carburetor.
- Start the dirt bike: Turn on the engine and listen for any irregularities in its sound.
- Adjust the idle and mixture screws: Use the appropriate screwdrivers to adjust the idle and mixture screws until the engine runs smoothly and idles correctly.
By following this step-by-step guide to cleaning the carburetor on a dirt bike, you can ensure optimal performance and prolong the lifespan of your bike. Remember to perform regular maintenance to keep your dirt bike in top shape for all your off-road adventures.
Tips And Tricks For Cleaning A Carburetor On A Dirt Bike
Using Carburetor Cleaning Solutions and Sprays Effectively
When it comes to cleaning a carburetor on a dirt bike, using the right cleaning solutions and sprays is crucial. One popular option is the Berryman Chem-Dip Carburetor Cleaner, which is highly effective in removing dirt, grime, and varnish buildup from carburetors. To use it effectively, follow these steps:
- First, remove the carburetor from the dirt bike and disassemble it.
- Place the disassembled carburetor parts in a container filled with the Berryman Chem-Dip Carburetor Cleaner.
- Let the parts soak in the cleaner for a recommended time (usually 15-30 minutes) to dissolve any stubborn buildup.
- After soaking, use a brass brush to scrub the metal components and a stiff nylon brush for plastic pieces.
- Ensure that all the tiny vents and passages are thoroughly cleaned.
- Rinse the parts with water and blow them dry using compressed air or an air duster.
- Once all the parts are dry, reassemble the carburetor and reinstall it on the dirt bike.
This method of using carburetor cleaning solutions and sprays effectively can help restore the optimal performance of your dirt bike’s carburetor by eliminating any buildup that may be affecting its functionality.
Exploring Alternative Cleaning Methods for Stubborn Buildup
Sometimes, stubborn buildup in a dirt bike’s carburetor may require alternative cleaning methods. One such method involves using a carburetor cleaner spray. Here’s how you can use it effectively:
- Begin by removing the carburetor from the dirt bike and disassembling it.
- Use a carburetor cleaner spray specifically designed for motorcycles, such as Gumout Carb and Choke Cleaner.
- Spray the cleaner liberally on the carburetor’s components, focusing on the jets and other areas with visible buildup.
- Allow the cleaner to penetrate the buildup for a few minutes.
- Using an air line or a can of pressurized air, blow through the jets to remove loosened debris.
- Repeat the cleaning process if necessary until no more grime or buildup is visible.
- Once the cleaning is complete, reassemble the carburetor and reinstall it on the dirt bike.
By exploring alternative cleaning methods for stubborn buildup, you can ensure that your dirt bike’s carburetor is thoroughly cleaned and free from any debris that may hinder its performance.
Avoiding Common Mistakes During the Cleaning Process
While cleaning a carburetor on a dirt bike, it’s important to avoid common mistakes that could potentially damage the carburetor or compromise its performance. Here are some tips to steer clear of these mistakes:
- Don’t use harsh or abrasive cleaning agents that can corrode or damage carburetor components.
- Avoid submerging plastic or rubber parts in cleaning solutions for extended periods, as this can cause them to deteriorate.
- Do not force any part during disassembly or reassembly, as it may lead to misalignment or breakage.
- Use the recommended cleaning solutions and sprays specifically designed for carburetors.
- Take note of the disassembly process to ensure that all components are correctly placed during reassembly.
- Refer to the manufacturer’s guidelines or a trusted repair manual for specific cleaning instructions.
By avoiding these common mistakes, you can protect your dirt bike’s carburetor during the cleaning process and maintain its longevity and functionality.
Ensuring Proper Maintenance of Cleaned Carburetors Going Forward
After cleaning a dirt bike’s carburetor, it’s essential to implement proper maintenance practices to keep it functioning optimally. Here are some tips for ensuring the proper maintenance of cleaned carburetors:
- Regularly inspect the carburetor for any signs of dirt, debris, or buildup.
- Keep the air filter clean and replace it when necessary to prevent contaminants from entering the carburetor.
- Use high-quality fuel and avoid using old or contaminated gasoline that can leave residue in the carburetor.
- Consider using fuel additives or carburetor cleaners as recommended by the manufacturer to prevent future buildup.
- Follow the manufacturer’s recommended maintenance schedule and perform any necessary tune-ups or adjustments regularly.
- Store the dirt bike in a clean and dry environment to minimize the risk of dirt or moisture entering the carburetor.
By adhering to these maintenance practices, you can prolong the cleanliness and functionality of your dirt bike’s carburetor, ensuring optimal performance on every ride.
Credit: www.mxstore.com.au
Frequently Asked Questions For How To Clean A Carburetor On A Dirt Bike
How Do You Clean A Dirt Bike Carburetor Without Removing It?
To clean a dirt bike carburetor without removing it, spray carb cleaner into the jets and let it soak for a few minutes. Use an air duster to blow through the jets, repeating until no more debris is visible.
How Do You Clean A Carburetor Without Removing It?
To clean a carburetor without removing it, follow these steps: 1. Spray carb cleaner into the jets, letting it soak for a few minutes. 2. Use an air line to blow through the jets. 3. Repeat the previous steps until no more dirt is visible.
By doing this, you can clean the carburetor without the hassle of removal.
How Do I Know If My Dirt Bike Carburetor Is Bad?
Signs of a bad dirt bike carburetor include strange sounds, a lean or rich fuel ratio, black smoke from the exhaust, refusal to start, backfiring, poor engine performance, and idling issues. Cleaning the carburetor without removing it involves spraying carb cleaner into the jets, soaking it for a few minutes, and using an air line to blow through the jets.
Repeat until no more dirt is visible.
Can I Clean A Carburetor Myself?
Yes, you can clean a carburetor yourself. Spray carb cleaner into the jets and let it soak for a few minutes. Use compressed air to blow through the jets and repeat until clean. Soak and scrub all parts with a carb cleaner solution.
Clean the tiny vents as well.
How Do You Clean A Dirt Bike Carburetor Without Removing It?
To clean a dirt bike carburetor without removing it, spray it with carb cleaner and let it soak. Then, use compressed air to blow through the jets and repeat until clean.
Conclusion
To conclude, cleaning the carburetor on a dirt bike is essential for maintaining its performance and longevity. By following the steps outlined in this guide, you can effectively clean the carburetor without removing it, ensuring optimal fuel flow and combustion.
Regular carburetor maintenance is crucial in preventing issues such as poor engine performance, starting problems, and idling issues. By keeping your carburetor clean, you can enjoy a smooth and reliable ride on your dirt bike.