How to Charge Motorcycle Battery Without Charger? Ultimate Guide
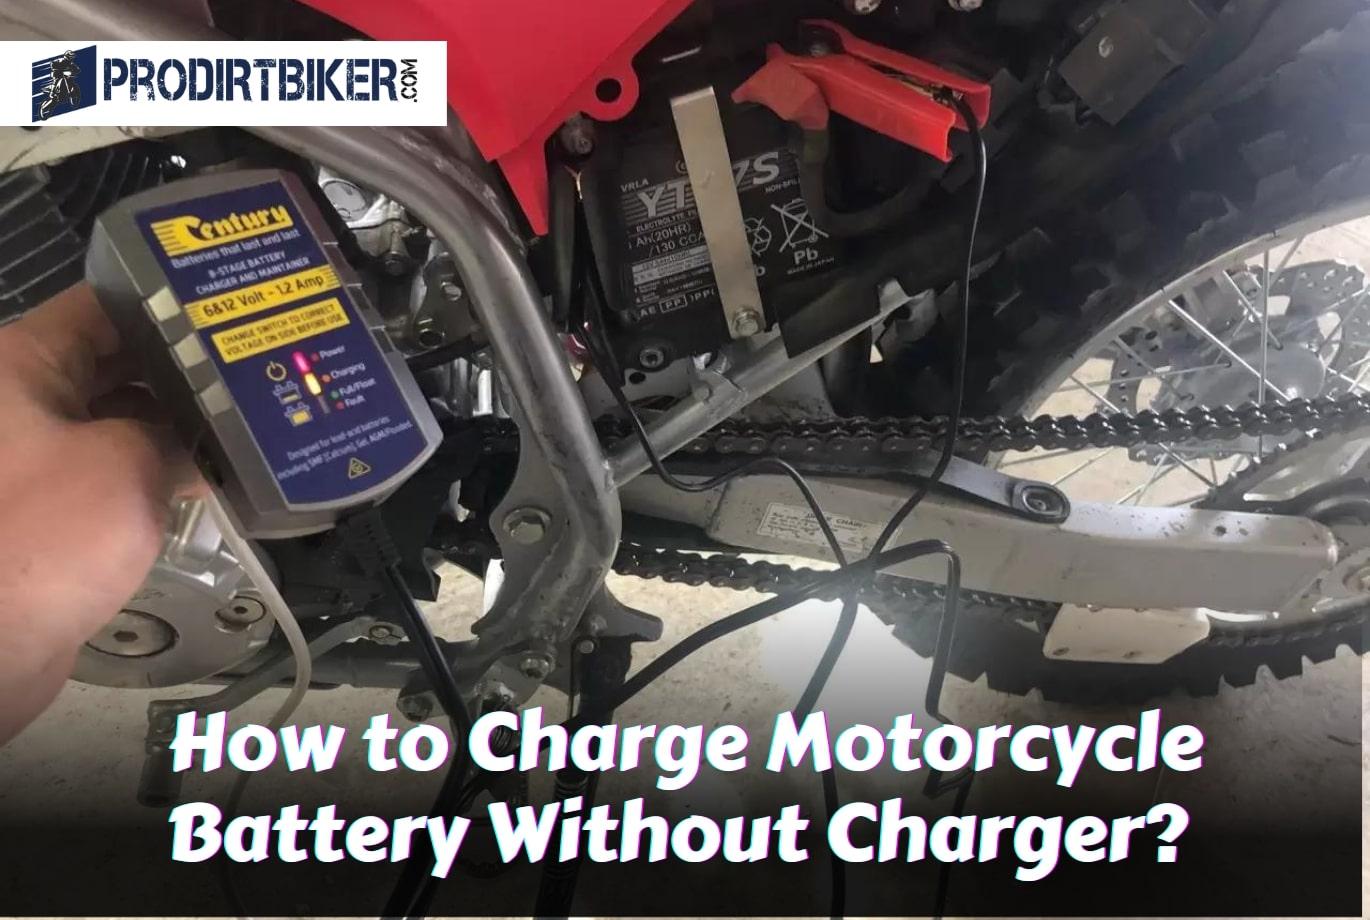
If you find yourself with a dead motorcycle battery and no charger in sight, don’t panic just yet. There are actually a few ways you can charge your motorcycle battery without a charger. In this blog post, we’ll explore some simple and creative methods for charging your battery using common household items.
From jump-starting your bike to using alternative power sources, we’ve got you covered. So, if you’re in a pinch and need to get your motorcycle back on the road, keep reading to learn how to charge your battery without a charger.
How to Charge Motorcycle Battery Without Charger?
To charge a motorcycle battery without a charger, you can jump-start it using another vehicle’s battery and jumper cables. Simply connect the positive terminals of both batteries and then connect the negative terminal of the charged battery to the motorcycle’s engine.
Charging a motorcycle battery without a charger can be done using a few alternative methods. Keep in mind that these methods may take longer and may not be as efficient as using a dedicated battery charger. Here’s a step-by-step process for charging a motorcycle battery without a charger:
Materials You’ll Need:
- Distilled water (if your battery is a maintenance-type battery)
- A voltmeter
- Jumper cables or a power source
- Safety gear (gloves and safety glasses)
Step 1: Safety First Before attempting to charge your motorcycle battery, ensure that you are working in a well-ventilated area and that you are wearing the necessary safety gear, including gloves and safety glasses. This will protect you from any potential acid or electrical hazards.
Step 2: Check the Battery Type Determine if your motorcycle battery is a maintenance-free sealed battery or a conventional maintenance-type battery. Maintenance-free batteries typically don’t require adding distilled water, while maintenance-type batteries might.
Step 3: Inspect the Battery Check the battery for any signs of damage, such as cracks or leaks. If the battery is damaged, it may need to be replaced rather than charged.
Step 4: Check Battery Voltage Use a voltmeter to measure the voltage of your motorcycle battery. A healthy battery should read around 12.6 volts or higher. If it’s significantly lower, it may need charging.
Step 5: Top Off Water (If Necessary) If you have a maintenance-type battery, carefully remove the battery caps (if present) and check the electrolyte levels. If they are low, add distilled water to bring them to the recommended levels. Be cautious not to overfill.
Step 6: Connect Jumper Cables If you have access to a power source, such as another vehicle with a charged battery, you can use jumper cables to charge your motorcycle battery. Connect the positive (red) clamp of the jumper cable to the positive terminal of your motorcycle battery and the other end to the positive terminal of the power source. Then, connect the negative (black) clamp to the negative terminal of the power source. Do not connect the negative clamp to the motorcycle battery directly.
Step 7: Charge the Battery Turn on the power source and allow it to charge your motorcycle battery. Monitor the battery voltage with the voltmeter. Charging times will vary depending on the state of the battery and the power source, but it may take several hours.
Step 8: Disconnect and Test Once the battery voltage reaches an acceptable level (around 12.6 volts or higher), disconnect the jumper cables in reverse order (negative first, then positive). Recheck the battery voltage to ensure it remains stable.
Step 9: Reinstall Caps (If Necessary) If you have a maintenance-type battery, reinstall the caps securely.
Step 10: Reinstall the Battery Place the recharged or maintained battery back in your motorcycle, ensuring that the terminals are securely tightened.
Step 11: Test Start the Motorcycle Attempt to start your motorcycle to verify that the battery is functioning correctly.
Difficulty Starting The Motorcycle
- The engine struggles to turn over or doesn’t start at all.
- You hear a clicking noise when you attempt to start the motorcycle.
- The starter motor seems unresponsive, despite repeated attempts to start the bike.
- The motorcycle’s electrical systems, such as lights and indicators, may not function properly.
Dimming Headlights
- Your motorcycle’s headlights appear noticeably dimmer than usual.
- The brightness of the headlights decreases when you attempt to start the bike.
- The headlights flicker or intermittently go off.
Clicking Sound When Trying To Start The Motorcycle
- When turning the key or pushing the start button, you hear a rapid clicking noise.
- The clicking noise repeats itself but the engine does not engage.
- This sound indicates that the battery is too weak to provide enough power to start the motorcycle.
By being aware of these signs, you can quickly identify a dead motorcycle battery and take appropriate action. Whether it involves charging the battery or seeking professional assistance, addressing a dead battery promptly will ensure you’re back on the road enjoying your two-wheeled adventures in no time.
Precautions And Safety Measures
Motorcycle batteries are an essential component for keeping our bikes running smoothly, but what happens when you find yourself with a dead battery and no charger in sight? While it may seem like a daunting task, charging a motorcycle battery without a charger is indeed possible.
However, it’s crucial to keep in mind some essential precautions and safety measures to ensure the process goes smoothly and without any mishaps. So, before you start reviving your battery, here are a few key points to consider:
Importance Of Wearing Protective Gear
When working with any electrical equipment, including motorcycle batteries, it’s crucial to prioritize your safety above all else. Wearing the appropriate protective gear can significantly reduce the risk of accidents or injuries. Here are a few measures to keep in mind:
- Always wear gloves to protect your hands from accidental shocks or acid spills.
- Use safety goggles or a face shield to shield your eyes from harmful chemicals or battery acid.
- Wear a long-sleeved shirt and pants to cover your skin and minimize exposure to any corrosive substances.
Properly Grounding The Motorcycle
To ensure a safe charging process, it’s essential to properly ground your motorcycle. This prevents the risk of electrical short circuits and potential damage to your bike’s electrical system. Here’s what you need to do:
- Start by parking your bike on a flat, non-conductive surface, away from any flammable materials.
- Locate the grounding bolt on your motorcycle and securely attach a grounding cable to it.
- Connect the other end of the grounding cable to a metal surface or earthground point nearby.
Ensuring A Well-Ventilated Area
Charging a motorcycle battery can release potentially harmful gases. Therefore, it’s crucial to work in a well-ventilated area to minimize the risk of inhaling these gases and to prevent the buildup of explosive vapors. Take note of the following measures:
- Charge the battery in an open or well-ventilated space, preferably outdoors.
- Avoid charging the battery in a closed garage or a confined area without proper airflow.
- Keep away from open flames, sparks, or any other potential sources of ignition.
By adhering to these precautions and safety measures, you can safely charge a motorcycle battery without a charger. However, always remember to consult your bike’s manual and exercise caution throughout the process. Stay safe and get back on the road with a fully charged battery!
Method 1: Bump Starting The Motorcycle
Step-By-Step Guide To Bump Starting The Motorcycle
Bump starting a motorcycle is a handy technique to charge the battery when you don’t have access to a charger. This method utilizes the bike’s kinetic energy to start the engine and recharge the battery. If you find yourself in a situation where your motorcycle battery is dead, here’s a step-by-step guide to help you bump start it:
- Ensure safety: Before attempting to bump start your motorcycle, put on your helmet, and make sure you’re in an open space, away from traffic and obstacles.
- Choose the right location: Find a slight incline or a flat surface to perform the bump start. This will make it easier to get the bike moving.
- Put the motorcycle in neutral: Disengage the clutch and shift the motorcycle into neutral. This will allow the wheels to spin freely.
- Stand alongside the bike: Stand next to your motorcycle, holding the handlebars firmly with both hands.
- Build momentum: Begin running alongside the bike, pushing it gradually to gain momentum. The faster you can get the wheels spinning, the easier it will be to bump start the motorcycle.
- Jump onto the seat: Once you have built up enough speed, hop onto the seat, quickly grabbing the clutch lever with your left hand and pressing the starter button with your right thumb.
- Engage the clutch: While still pressing the starter button, engage the clutch smoothly. This action will transfer the energy from the spinning wheels to the engine, kickstarting it back to life.
- Shift into gear: As soon as the engine roars to life, shift into first gear by releasing the clutch slowly while maintaining a steady throttle.
- Keep riding: Once the motorcycle is up and running, keep riding for some time to allow the battery to charge. This will ensure that the battery has enough power for the next start.
How To Select The Appropriate Gear
Choosing the right gear is crucial when bump starting a motorcycle. Here’s how to select the appropriate gear for a successful bump start:
- Make sure the motorcycle is in neutral before starting the process.
- Choosing first gear is typically the safest option, as it provides more torque to turn over the engine.
- Consider the motorcycle’s weight and power. If you’re riding a heavier bike, you may need to select a lower gear to generate enough force for a successful bump start.
- Avoid using higher gears, as they may not provide enough power to turn the engine over.
Tips To Avoid Damaging The Motorcycle While Bump Starting
While bump starting a motorcycle can be an effective technique to charge the battery, it’s essential to take precautions to avoid damaging your bike. Here are some tips to keep in mind:
- Understand your motorcycle’s specifications and limitations before attempting a bump start. Refer to the owner’s manual for guidance.
- Ensure there’s enough space around you to prevent collisions or accidents while running alongside the bike.
- Be cautious when jumping onto the seat and engaging the clutch to avoid jerky movements, which can strain the bike’s drivetrain.
- Avoid prolonged attempts at bump starting, as it can put extra stress on the engine and other components.
- If bump starting doesn’t work after a few attempts, consider seeking professional assistance to diagnose any underlying issues with the battery or electrical system.
By following these steps and taking necessary precautions, you can successfully bump start your motorcycle and get back on the road even without a charger. Remember to prioritize your safety and the well-being of your motorcycle while performing this technique.
Method 2: Using Jumper Cables And Another Vehicle
Overview Of Jumper Cables And How They Work
Jumper cables are an essential tool for anyone who finds themselves with a dead motorcycle battery. They are designed to transfer electrical energy from a fully charged battery to a dead battery, providing the necessary power to start the engine.
Jumper cables consist of two insulated cables with heavy-duty clamps at each end. The clamps are color-coded to prevent any confusion during the connection process. The red clamp is positive, while the black clamp is negative. When connected correctly, the cables create a circuit that allows the flow of electricity from the working battery to the dead one.
Step-By-Step Guide To Using Jumper Cables With Another Vehicle
Using jumper cables with another vehicle can be a simple and effective way to charge your motorcycle battery. Follow these steps for a hassle-free process:
- Position the vehicles: Park the vehicle with the working battery close enough to your motorcycle so that the jumper cables can reach both batteries easily. Ensure that both vehicles are turned off and the ignition is in the off position.
- Connect the cables: Open the hoods of both vehicles, exposing their batteries. Attach the positive (red) clamp of the jumper cables to the positive terminal of the working battery. Then, attach the other end of the positive clamp to the positive terminal of your motorcycle battery. Similarly, connect the negative (black) clamp to the negative terminal of the working battery, and the other end to a metal, unpainted part of your motorcycle’s frame or engine block.
- Start the working vehicle: Once the cables are securely connected, start the engine of the vehicle with the working battery. Allow it to run for a few minutes to ensure it transfers enough power to your motorcycle battery.
- Start your motorcycle: With the booster vehicle still running, attempt to start your motorcycle. If the battery was discharged but still has some power remaining, it should start up successfully. If not, wait a few more minutes and try again.
- Disconnect the cables: Once your motorcycle is running, carefully remove the cables in the reverse order of connection. Start by disconnecting the black clamp from your motorcycle’s frame, followed by the negative clamp from the working battery. Finish by removing the positive clamp from your motorcycle battery and then the positive clamp from the working battery.
Precautions And Safety Measures When Using Jumper Cables
While using jumper cables, it’s crucial to prioritize safety to prevent any accidents or damage. Keep the following precautions in mind:
- Ensure that the vehicles’ engines are off and the ignition is in the off position before connecting the cables.
- Double-check that the clamps are securely attached to the battery terminals to prevent any possible sparks.
- Always connect the cables in the correct order: Red clamp to positive terminal, black clamp to negative terminal.
- Avoid touching the clamps together or allowing them to come into contact with any metal surface.
- Never smoke or have an open flame near the batteries.
- Do not attempt to jump-start a battery that is leaking, cracked, or damaged.
- If the vehicle does not start after a few attempts, it’s best to seek professional help or consider a different method of charging the battery.
By following these step-by-step instructions and adhering to the necessary precautions, you can successfully charge your motorcycle battery using jumper cables and another vehicle. Remember to prioritize safety and take the necessary time to ensure a proper connection.
Method 3: Utilizing Gravity To Recharge The Motorcycle Battery
Explanation Of The Gravity Method
Gravity method is one of the alternative ways to charge your motorcycle battery without a charger. This method utilizes basic physics principles to generate energy and recharge the battery. The basic idea is to create a gravity-powered flow of electrolyte solution that can circulate and charge the battery.
By setting up a simple contraption, you can harness the power of gravity to restore the energy in your motorcycle battery.
Step-By-Step Guide To Using The Gravity Method
To charge your motorcycle battery using the gravity method, follow these steps:
- Set up a contraption: First, create a setup that allows the flow of electrolyte between two containers. This can be done by placing one container higher than the other and connecting them with small-diameter tubes.
- Prepare the electrolyte solution: Fill the higher container with an electrolyte solution made of water and sulfuric acid. Make sure to wear protective gloves and eyewear while handling the acid. The concentration of acid should be around 1.265 specific gravity.
- Establish a flow: Open the valve at the bottom of the higher container to initiate the flow of electrolyte. The force of gravity will drive the solution from the higher container to the lower container through the connected tubes.
- Connect the battery: Position the positive terminal of the motorcycle battery to the higher container, while the negative terminal should be connected to the lower container. This will allow the flow of the electrolyte to reach and replenish the battery cells.
- Monitor the process: Keep an eye on the flow rate of the electrolyte and the charging process. Ensure that there is a steady flow of the electrolyte and check the battery voltage periodically.
- Adjust the flow rate: If the flow of electrolyte is too fast and causing overflow, adjust the valve to control the flow rate. The ideal flow rate should be slow and steady to provide effective charging without any spillage.
- Charge until optimal level: Continue the gravity charging process until the battery reaches an optimal charge level. This may take several hours or even days depending on the capacity of the battery and its initial charge level.
Factors To Consider When Using The Gravity Method
When utilizing the gravity method to charge your motorcycle battery, there are a few important factors to keep in mind:
- Battery condition: The gravity method is most suitable for batteries that are still in good condition and hold a charge reasonably well. If your battery is completely dead or damaged, this method may not be effective.
- Charging time: Gravity charging is a slow process compared to using a charger. It may take longer to fully charge your battery using this method, so plan accordingly and allow enough time for the process to complete.
- Safety precautions: Handling sulfuric acid can be hazardous, so it is crucial to wear protective gear such as gloves and eyewear. Also, make sure to work in a well-ventilated area to avoid inhaling any fumes.
- Monitor the battery: Regularly check the battery voltage during the charging process to avoid overcharging, which can damage the battery. Disconnect the battery once it reaches the optimal charge level.
By following these steps and considering the important factors, you can successfully utilize the gravity method to charge your motorcycle battery without a charger. Keep in mind that this method is best used as a temporary solution and should not replace a proper battery charger for regular maintenance.
Alternative Solutions For Reviving A Dead Motorcycle Battery
Exploring Alternative Methods To Revive A Dead Motorcycle Battery
Is your motorcycle battery dead and you don’t have a charger handy? Don’t worry, there are a few alternative solutions you can try to revive your battery and get back on the road. In this section, we will explore two methods that can help you revive a dead motorcycle battery: chemical additives and desulfators, and charging the battery with a solar panel.
Chemical Additives And Desulfators
- Chemical additives: There are special chemical additives available in the market that claim to revive dead batteries by dissolving sulfation. Sulfation occurs when the sulfuric acid in the battery reacts with the lead plates and forms a layer of lead sulfate. These additives are designed to break down this layer and restore battery performance. However, it’s important to note that the effectiveness of these additives may vary, and they may not always work for heavily sulfated batteries.
- Desulfators: A desulfator is a device that uses high-frequency pulses to break down the lead sulfate crystals in the battery. This process helps restore the battery’s ability to hold a charge. Desulfators are available as standalone devices or as part of battery chargers. They are relatively easy to use, and many motorcycle enthusiasts have reported success in reviving dead batteries using desulfators. However, it’s worth mentioning that desulfation may not work for batteries that have been heavily damaged or are too old.
Charging The Motorcycle Battery With A Solar Panel
- Solar panels: If you find yourself stranded with a dead motorcycle battery and have access to sunlight, you can consider using a solar panel to recharge your battery. Here’s how you can do it:
- Choose a solar panel with sufficient wattage to generate the necessary power to charge your battery.
- Connect the positive terminal of the solar panel to the positive terminal of the battery and the negative terminal to the negative terminal.
- Make sure the solar panel is placed in direct sunlight to maximize its efficiency.
- Keep an eye on the battery’s voltage using a multimeter and disconnect the solar panel once the battery reaches a safe voltage level.
Remember, using a solar panel to charge a dead battery can take a significant amount of time, especially if the battery is deeply discharged. Additionally, this method may not work efficiently in cloudy or rainy weather conditions.
While these alternative methods can help revive a dead motorcycle battery, it’s important to note that they may not always be successful, especially if the battery is severely damaged or too old. In such cases, it’s advisable to consult a professional or invest in a new battery to ensure a reliable and safe riding experience.
Tips For Maintaining A Healthy Motorcycle Battery
Having a well-charged motorcycle battery is crucial for a smooth and trouble-free ride. But what if you find yourself without a charger? Don’t worry! There are still ways to charge your motorcycle battery without a charger. In this section, we will explore some essential tips for maintaining a healthy motorcycle battery, ensuring optimal performance and longevity.
Importance Of Regular Maintenance
Regular maintenance plays a vital role in keeping your motorcycle battery healthy and fully charged. Here are some key points to consider:
- Keep your battery clean and free of dust and debris. Regularly inspect and clean the terminals, ensuring good contact between the battery posts and cables.
- Check the battery fluid levels regularly and top up as needed with distilled water if necessary. It’s essential to maintain the proper fluid level for optimal battery performance.
- Inspect the battery for any signs of damage, such as cracks or leaks, and replace it if necessary. A damaged battery can affect its overall functionality and lead to performance issues.
- Test the battery voltage periodically using a multimeter or battery tester. This will help you monitor the battery’s charge level and detect any potential issues early on.
Using A Battery Tender Or Maintainer
A battery tender or maintainer is a reliable and convenient tool for charging and maintaining your motorcycle battery. Here’s what you need to know:
- A battery tender or maintainer is designed to provide a slow and steady charge to your battery, preventing overcharging and maintaining the optimal charge level.
- Connect the battery tender or maintainer to the battery and plug it into a standard electrical outlet. The device will automatically detect the battery’s charge level and adjust the charging rate accordingly.
- It’s recommended to leave your battery connected to the tender or maintainer for extended periods, especially during storage or periods of inactivity. This will help maintain the battery’s charge and prolong its lifespan.
Storing The Motorcycle Properly During Periods Of Inactivity
Proper storage during periods of inactivity is crucial for preserving your motorcycle battery’s health. Consider the following tips:
- Before storing your motorcycle, give it a thorough wash and wax to remove any dirt or grime that could corrode the battery and other components.
- Park your motorcycle in a clean and dry area, away from extreme temperatures and direct sunlight. Excessive heat or cold can affect the battery’s performance and lead to premature deterioration.
- Disconnect the battery from the motorcycle to prevent any parasitic drains. This will help maintain the battery’s charge level during long periods of inactivity.
- Consider using a battery tender or maintainer during storage to ensure the battery remains fully charged and in optimal condition.
By following these tips for maintaining a healthy motorcycle battery, you can keep your battery charged, extend its lifespan, and enjoy worry-free rides. Remember, regular maintenance, using a battery tender or maintainer, and proper storage are key to ensuring the longevity and performance of your motorcycle battery.
Frequently Asked Questions For How To Charge Motorcycle Battery Without Charger
How Can I Charge My Motorcycle Battery Without A Charger?
To charge a motorcycle battery without a charger, you can try options such as using a jump-start, a battery tender, or a solar charger.
Is It Safe To Charge A Motorcycle Battery Without A Charger?
While it is possible to charge a motorcycle battery without a charger, using a proper charger is generally considered safer and more effective.
Can I Use A Car Charger To Charge My Motorcycle Battery?
Using a car charger to charge a motorcycle battery is not recommended as car chargers are designed for higher voltage and may damage the motorcycle battery.
Can I Charge A Motorcycle Battery With A Power Bank?
In most cases, power banks do not provide enough voltage to successfully charge a motorcycle battery and may not be suitable for this purpose.
What Are Some Alternative Ways To Charge A Motorcycle Battery Without A Charger?
Besides jump-starting and using a battery tender or a solar charger, you can also push-start the motorcycle or remove the battery and charge it externally.
Conclusion
To conclude, charging a motorcycle battery without a charger may seem like a daunting task, but with the right knowledge and methods, it is indeed possible. By utilizing alternative methods like jump-starting with another vehicle, using a trickle charger, or employing the help of a battery optimizer, you can effectively recharge your motorcycle battery without a charger.
It is important to remember to take safety precautions during the charging process and ensure that you are following the correct steps outlined in this blog post. Regular maintenance and care of your motorcycle battery can also help prevent the need for emergency charging situations.
So, the next time you find yourself with a dead battery and no charger at hand, remember these techniques and you’ll be back on the road in no time. Keep your battery charged, and happy riding!